Great am I going to have to crack this thing too? 😉 https://t.co/CBJf7CZrGM
— Keith Kaisershot (@ablitter) April 12, 2020
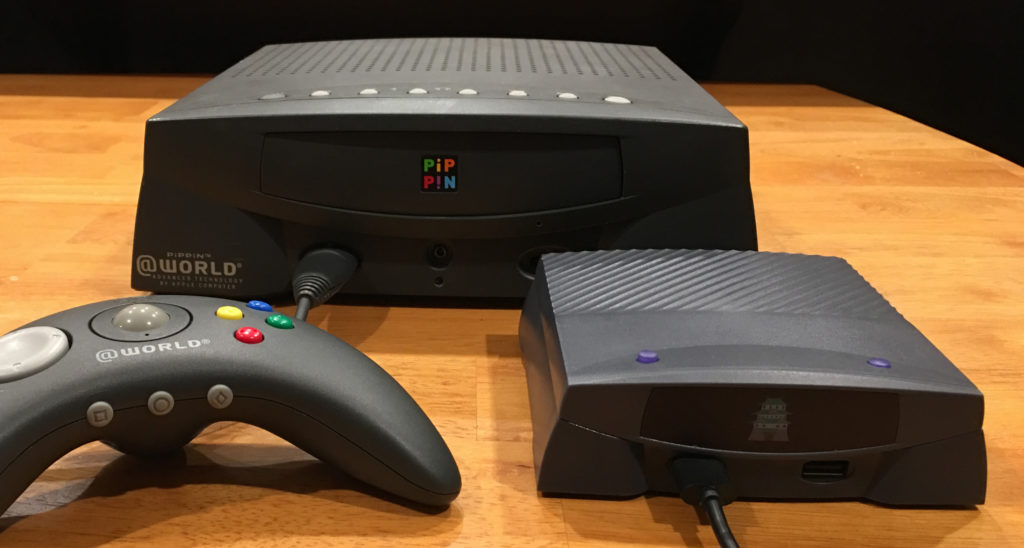
OK, I’ll admit that the Retroquest Super Retro Castle isn’t really a “Pippin Classic,” but it sure looks the part, and when I learned of its existence back in April, I figured it had to have at least as much power as a stock Pippin. Its advertised specs reminded me of the Raspberry Pi, leading me to speculate that maybe the Super Retro Castle is nothing more than a Raspberry Pi in a fancy Pippin-inspired case:
- Two USB controller ports
- HDMI output
- microSD slot
- DC power jack
Odds seemed good to me that it runs either a variant of Android or mainline Linux. Therefore, couldn’t I turn it into a sort of miniature Pippin console?
With a working knowledge of Linux and a little bit of hardware hacking, maybe I can. 🙂
Coaxing the Super Retro Castle into running user-provided code is certainly easier than cracking its inspiration. Booting it quickly reveals that it’s running a mostly-stock build of RetroArch on Linux, and booting it with the bundled microSD card inserted reveals that it’s configured to search the card for supplemental configurations. A-ha, a vector! Without making any modifications to the console itself, it is trivial to add new ROMs and even new libretro modules for emulators not built in to the Super Retro Castle. Just make sure the desired modules are built for the “armhf” architecture and the respective .lpl playlist file is configured with the correct path to the .so file under the microSD card’s /storagesd mountpoint, and you’re off to the races.
This is great if you don’t mind the Super Retro Castle’s built-in software and interface and are content to use it as an cheap emulator box. Don’t get me wrong, it’s great at what it does, but 1) I can’t read Japanese and 2) I’d like to be able to replace its built-in software with something newer, or something different entirely. To do that, I’d have to break out of its RetroArch jail and get access to its filesystem, ideally via a shell.
Rooting the Super Retro Castle, though similarly easy, requires a bit more elbow grease. Step one is getting the case apart, which is pretty straightforward: Just remove the four Phillips-head screws located underneath the rubber pads on the underside of the case:

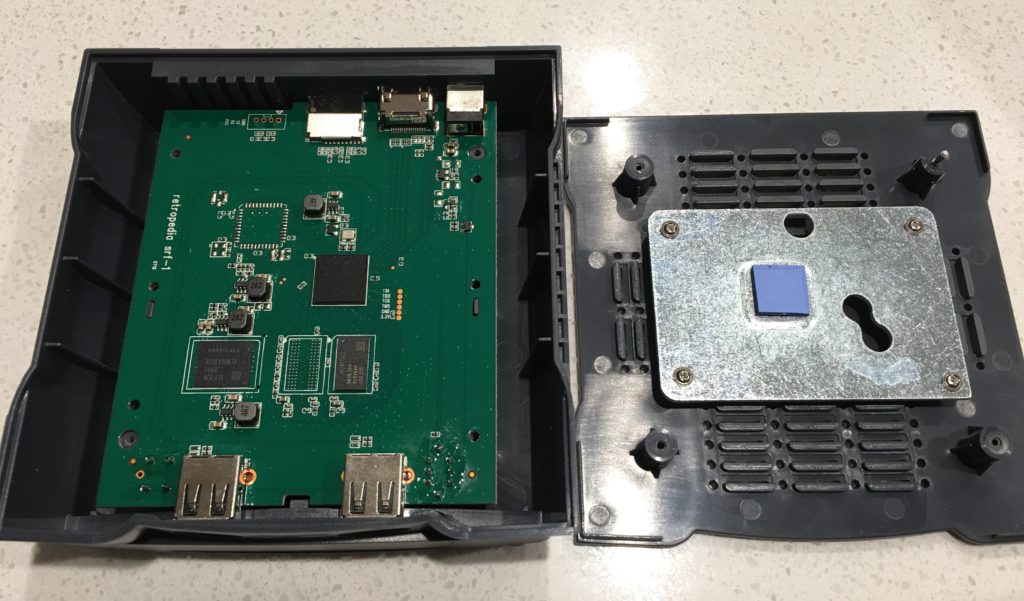
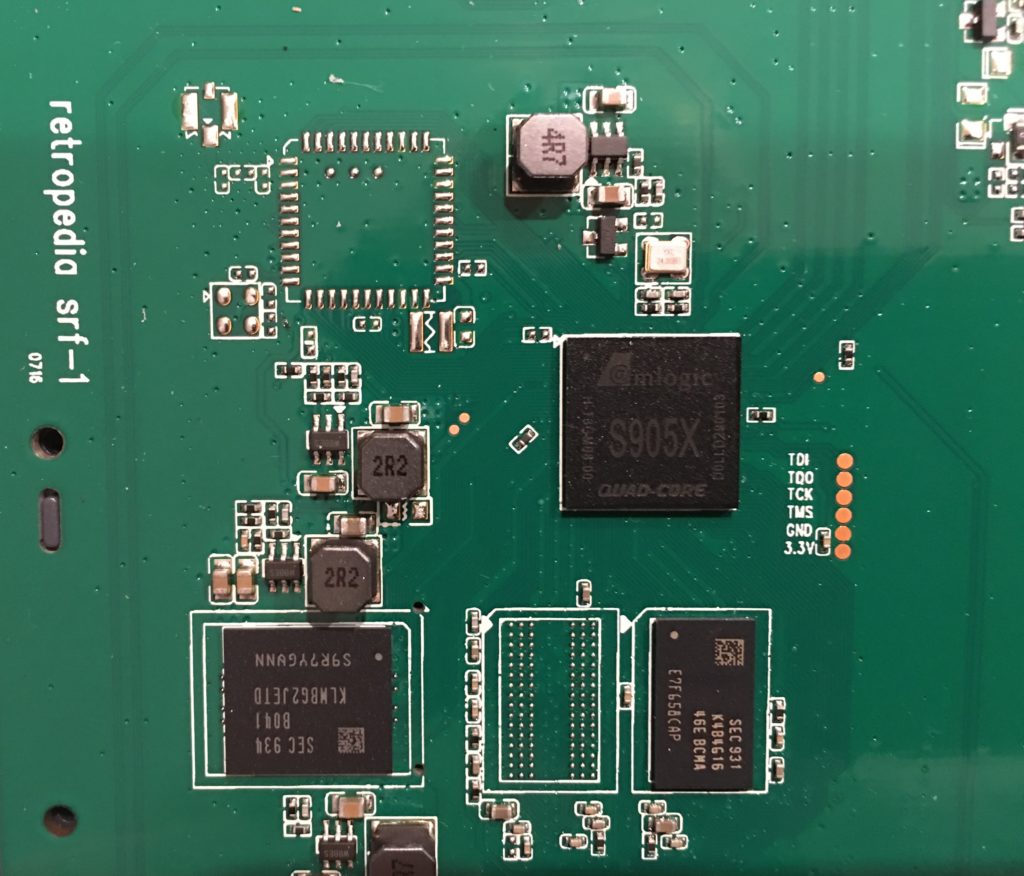
Right away we notice that most of the console’s weight is concentrated in the metal heatsink affixed to the bottom of the case. But the other thing we see is that the Super Retro Castle is not a Raspberry Pi or derivative at all; it appears to be a custom logic board built around the Amlogic S905X SoC.
The very pulse of the machine
Wikipedia tells me quite a bit about the S905X: It sports a quad-core ARM-based CPU clocked at 1.2 GHz, a Mali-450 GPU, and support for decoding H.264-encoded video at up to 1080p60 in hardware. Quite the chip. When implemented on the Super Retro Castle board, the S905X is supported by two Samsung K4B461646E-BCMA chips for a total of 1 GiB of RAM, and one Samsung KLMBG2JETD-B041 eMMC chip for 32 GiB of onboard storage. The latter definitely explains the wealth of preloaded ROMs available for selection right after bootup. 😉
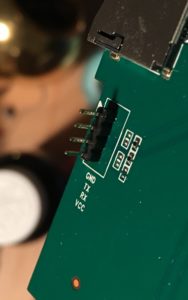
A handful of pads next to the S905X chip suggest a JTAG interface, but what piques my interest is this small set of vias next to the microSD card slot:
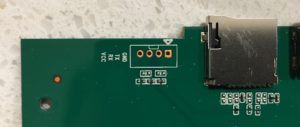
GND, TX, RX, and VCC? That sure looks like a UART serial interface to me, and if the Linux image used is only slightly tweaked from defaults, I should expect to see a console on this interface at 115200 baud. But first, let’s solder on a header:
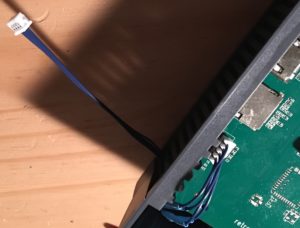
Next, route a short cable out through the rear vent holes…
… reassemble it…
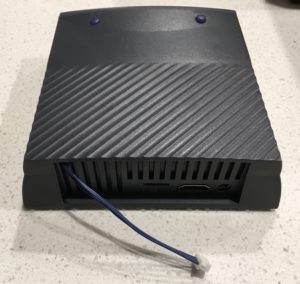
… and now it almost vaguely resembles a Pippin dev/test kit. 😛
Side note about UARTs
It is tempting to think of a UART interface such as the one found on the Super Retro Castle as the same interface used by oldschool PC serial ports (RS-232 / RS-422). But beware: they are not the same. Not only are the voltage ranges different—between -15 and +15 V for RS-232 and -6 to +6 V for RS-422—but UARTs are TTL devices (transistor-transistor logic) that expect voltages between 0V for logic low, and either 3.3V or 5V for logic high. Attempting to drive a UART by naively wiring it to a USB serial adapter (as I initially did) therefore runs the risk of frying the UART, which in the instance of the Super Retro Castle is built in to the S905X SoC. Fortunately the Super Retro Castle has some protective circuitry somewhere, so while my initial efforts produced garbage data regardless of baud rate, I was lucky in that I could try again with a proper USB UART adapter. I picked up a μART from Crowd Supply for this purpose and I really like it so far. 🙂
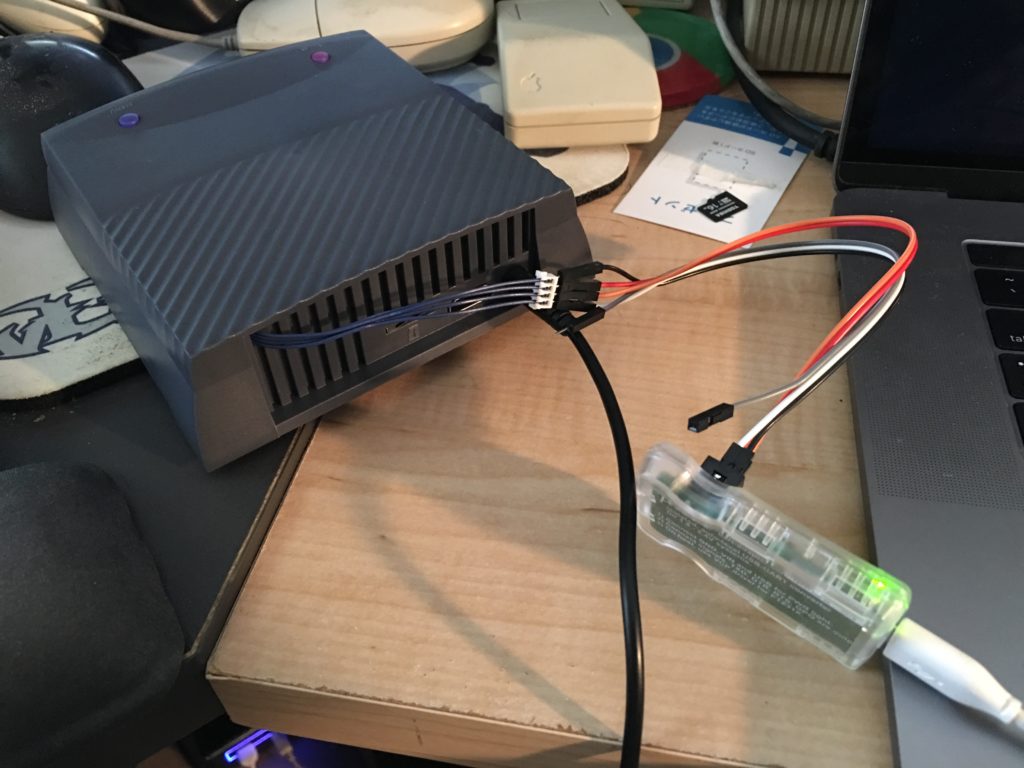
Getting root at this point just required wiring the GND, TX, RX, and VCC pins to my μART adapter, connecting the adapter to my PC, and opening up a PuTTY instance over the COM port it provides. At 115200 baud, I get a full boot log confirming four CPU cores each clocked at 1.2 GHz, U-Boot as the bootloader, and a build of Lakka running from the internal eMMC chip mounted read-only, followed by a root shell prompt. The initial syslog also seems to indicate the presence of a network interface—this follows from the description of the S905X chip on Wikipedia, but I don’t see any unused pads on the main board suggesting the relevant pins are routed from the SoC. Next steps for me will be backing up an image of the internal filesystem before attempting to remount it read-write so I can augment it with my own provided software.
Maybe I can get Advanced Mac Substitute to run on it and truly turn it into a real “Pippin Classic.” 🙂
can u tell me more about accessing this through UART and what you have done?? did u magage to backup and modify this???